Connecting dbt™ to Snowflake - A definitive guide
Let's dive into methods of connecting dbt™ to Snowflake and how Paradime can significantly ease the process.

Kaustav Mitra
Jul 24, 2024
·
5
min read

Ready to supercharge your data transformations? Let's dive into connecting dbt™ to Snowflake. We'll cover three rock-solid methods: username/password, OAuth, and key pair authentication in this guide. Buckle up!
1. Username and Password: The Classic Approach
Simple and straightforward, but watch out for security risks.
Here's how to set it up in your profiles.yml:
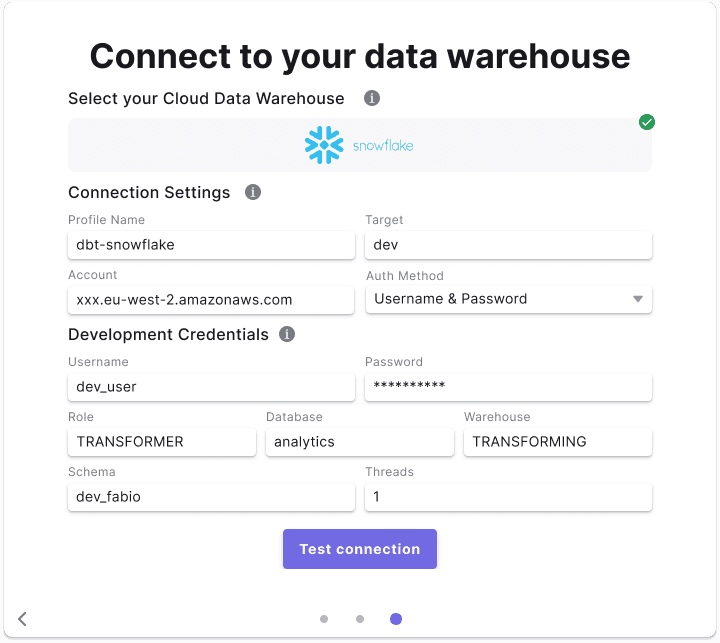
Working with YAML file and storing username and passwords in local machines is not recommended and poses significant security risks. So, in Paradime we make the process as easy as filling up a form and we generate and store the profiles.yaml securely in the cloud. See how to setup Snowflake using Username-Password in Paradime.
2. OAuth: Secure and User-Friendly
OAuth is the way to go for enhanced security.
2.1 First, set up an OAuth app in Snowflake:
While creating the OAuth app in Snowflake, pay attention to the redirect_uri and the token_ validity parameters above. Redirect URI depends on the provider you are using. For example, in Paradime, you can find the redirect URIs at in our Configure Snowflake OAuth section of the help docs.
Get the client ID and secret in the previous step as follows:
2.2 Now, update your profiles.yml:
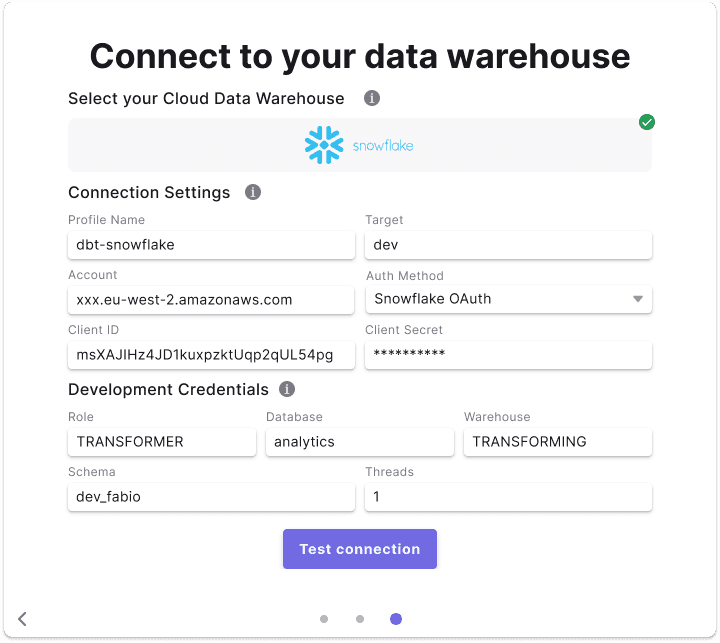
In Paradime, this process is significantly faster. Once an OAuth app is created, an admin on Paradime can create the connection and every additional user just needs to authenticate from Paradime on their Snowflake. The biggest benefit of this approach is that users can use Paradime and SSO + MFA on their Snowflake all together. See how to setup Snowflake using OAuth with Paradime.
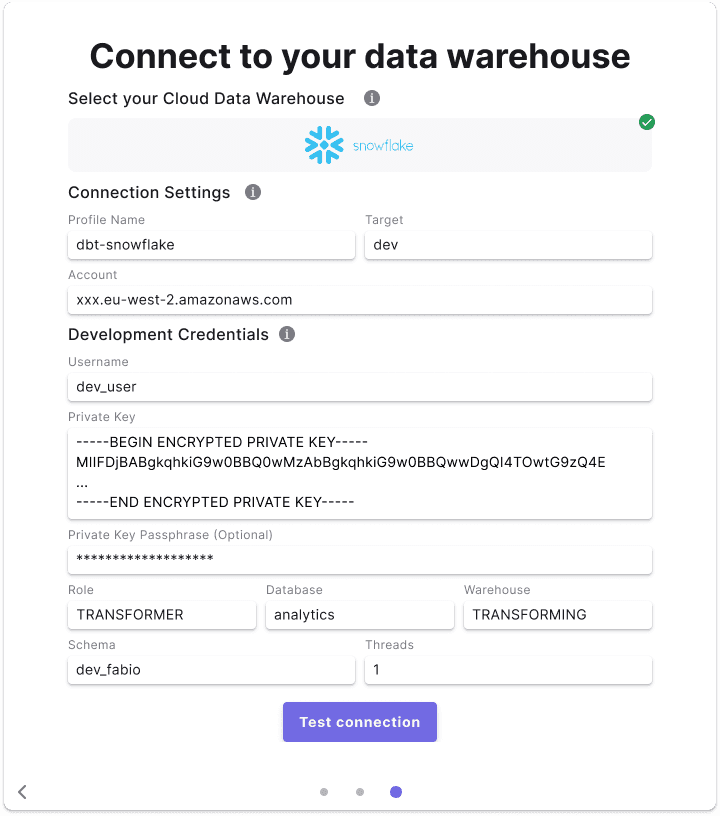
3. Key Pair Authentication: For the Security Obsessed
3.1. Generate the private key:
This command does two things:
- Generates a 2048-bit RSA key
- Converts it to PKCS8 format, which Snowflake requires
3.2. Extract the public key:
This extracts the public key from your private key file.
3.3. Format the public key for Snowflake:
This command formats the public key as a single line with '\n' for newlines, and copies it to your clipboard.
3.4. Add the public key to your Snowflake user:
3.5. Use the private key in your dbt™ profile:
Key points to remember:
- Keep your private key (rsa_key.p8) secure and never share it
- The public key (rsa_key.pub) is safe to share with Snowflake
- Use a strong passphrase if you choose to encrypt the private key
- Store the private key path securely, preferably as an environment variable
Remember to handle these keys with care. The private key grants access to your Snowflake account, so treat it like a password.
Keeping private key stored in local laptops defeats the purpose of enhanced security. On Paradime, we make this process much more secure by generating the profiles.yaml and keeping it away from user access. See how to setup Snowflake and Key-Pair authentication on Paradime.
Pro Tips:
1. Always use environment variables for sensitive info.
2. Rotate credentials regularly.
3. Use the least privileged role necessary for your dbt™ tasks.
4. Test your connection with `dbt debug` before running models.
Security considerations for each of the methods:
Let's break down the security considerations for each connection method as follows:
Username/Password
Passwords can be compromised if not properly secured
Risk of exposure in plain text configurations
Requires frequent password rotation
Vulnerable to brute force attacks
Not suitable for automated systems or CI/CD pipelines
OAuth
More secure than username/password
Supports token-based authentication
Allows for fine-grained access control
Tokens can be easily revoked if compromised
Reduces the risk of credential sharing
Integrates well with SSO and MFA systems
Key-Pair Authentication
Highly secure, uses asymmetric cryptography
Private key never transmitted over the network
Immune to password-based attacks
Ideal for automated systems and CI/CD pipelines
Key rotation can be less frequent than password changes
Requires careful management of private keys
Each connection method has its strengths and potential vulnerabilities, so choose the one that best aligns with your security requirements and operational needs.
There you have it! Three killer ways to connect dbt™ to Snowflake. Choose the method that fits your security needs and development workflow. Remember, a solid connection is the foundation of smooth dbt™ operations. Now go forth and transform that data like a boss!
Wrap Up
Paradime's got your back for everything dbt™ and Snowflake. Here's why we're crushing it:
Fixed Pricing, No Surprises and Bye-bye, consumption-based chaos. Hello, budget-friendly bliss!
Crystal Clear Costs: What you see is what you get. Period.
AI-Powered Productivity Boost: While others play catch-up, we're already in the future.
How are we doing it?
Turbocharge dbt Development with AI:
Our smart IDE doesn't just code – it thinks with you.Lightning-Fast dbt Pipeline Delivery:
Bolt and CI/CD that'll make your head spin (in a good way).Slash Warehouse Costs, Maximize Efficiency:
Radar Analytics: Your secret weapon for lean, mean data operations.
Ready to leave dbt Cloud™ in the dust? Hit us up for a chat.
Let's skyrocket your analytics game together! 🚀 🙌